DEPRECATION NOTICE: This entire page documents the legacy Inputs system.
For new projects: Use Data Binding instead.
For existing projects: Plan to migrate from Inputs to Data Binding as soon
as possible. This content is provided for legacy support only. Inputs can also be set on components at runtime, see Nested
Inputs below. Web
React
React Native
Flutter
Apple
Android
Examples
The web runtime provides an onLoad callback that’s run when the Rive file is loaded and ready for use. We use this callback to ensure that the state machine is instantiated before we query for inputs.<div id="button">
<canvas id="canvas" width="1000" height="500"></canvas>
</div>
<script src="https://unpkg.com/@rive-app/canvas@2.10.3"></script>
<script>
const button = document.getElementById('button');
const r = new rive.Rive({
src: 'https://cdn.rive.app/animations/vehicles.riv',
canvas: document.getElementById('canvas'),
autoplay: true,
stateMachines: 'bumpy',
onLoad: (_) => {
// Get the inputs via the name of the state machine
const inputs = r.stateMachineInputs('bumpy');
// Find the input you want to set a value for, or trigger
const bumpTrigger = inputs.find(i => i.name === 'bump');
button.onclick = () => bumpTrigger.fire();
},
});
</script>
stateMachineInputs function on the Rive object to retrieve the inputs. Each input will have a name and type. There are three types:
StateMachineInputType.Trigger which has a fire() functionStateMachineInputType.Number which has a value number property where you can get/set the valueStateMachineInputType.Boolean which has a value boolean property where you can get/set the value
const inputs = r.stateMachineInputs("bumpy");
inputs.forEach((i) => {
  const inputName = i.name;
  const inputType = i.type;
  switch (inputType) {
    case rive.StateMachineInputType.Trigger:
      i.fire();
      break;
    case rive.StateMachineInputType.Number:
      i.value = 42;
      break;
    case rive.StateMachineInputType.Boolean:
      i.value = true;
      break;
  }
});
Example
The react runtime provides a useStateMachineInput hook to make the process of retrieving a state machine input much simpler than that of the basic web runtime.import { useRive, useStateMachineInput } from "@rive-app/react-canvas";
export default function Simple() {
const { rive, RiveComponent } = useRive({
src: "https://cdn.rive.app/animations/vehicles.riv",
stateMachines: "bumpy",
autoplay: true,
});
const bumpInput = useStateMachineInput(rive, "bumpy", "bump");
return (
<RiveComponent
style={{ height: "1000px" }}
onClick={() => bumpInput && bumpInput.fire()}
/>
);
}
With the React Native runtime, most methods/triggers are available on the ref of the Rive component, including setting input values/triggering for state machines. In this case, there is no need to acquire an instance of an input. Simply set the input state from the Rive ref or fire an input state.export default function StateMachine() {
const riveRef = React.useRef<RiveRef>(null);
// Maintain the values of your state machine in React state
const [selectedLevel, setSelectedLevel] = useState('2');
const setLevel = (n: number) => {
setSelectedLevel(n.toString());
// No need to acquire an instance of a state machine input, just set the
// input state on the `riveRef` itself
riveRef.current?.setInputState("Designer's Test", 'Level', n);
};
return (
<SafeAreaView style={styles.safeAreaViewContainer}>
<ScrollView contentContainerStyle={styles.container}>
<Rive
resourceName={'skills'}
ref={riveRef}
autoplay={true}
stateMachineName="Designer's Test"
/>
<RadioButton.Group
onValueChange={(newValue) => setLevel(parseInt(newValue, 10))}
value={selectedLevel}
>
<View style={styles.radioButtonsWrapper}>
<View style={styles.radioButtonWrapper}>
<Text>{'Beginner'}</Text>
<RadioButton value={'0'} />
</View>
<View style={styles.radioButtonWrapper}>
<Text>{'Intermediate'}</Text>
<RadioButton value={'1'} />
</View>
<View style={styles.radioButtonWrapper}>
<Text>{'Expert'}</Text>
<RadioButton value={'2'} />
</View>
</View>
</RadioButton.Group>
</ScrollView>
</SafeAreaView>
);
}
See the React Native API’s to learn more about the parameters for .setInputState() and .fireState() Inputs are retrieved from a StateMachine instance.Access the state machine directly from the RiveWidgetController:final riveController = RiveWidgetController(riveFile);
final stateMachine = riveController.stateMachine;
final myTrigger = stateMachine.trigger('myTrigger');
final myBool = stateMachine.boolean('myBool');
final myNumber = stateMachine.number('myNumber');
myTrigger.fire(); // Trigger input
myBool.value = true; // Set boolean input
myNumber.value = 42.0; // Set number input
myTrigger.dispose();
myBool.dispose();
myNumber.dispose();
Setting input values for state machines goes through the RiveViewModel instantiated in the View class..setInput()
inputName (String) - Name of the input on a state machine to set a value forvalue (Bool, Float, or Double) - value to set for the associated inputName
triggerInput()
inputName (String) - Name of the input on a state machine to trigger
// Example of a number input
starsVM.setInput("Rating Changed", value: 5)

// Example of a boolean input
toggleVM.setInput("Switch Flipped", value: true)

// Example of a trigger input
confettiVM.triggerInput("Celebrate")
Just like other methods within the rive-android runtime, use the view to set values on a state machine input. In this case, there is no need to grab references to state machine input instances to set values.There are 3 different methods to set input values or trigger inputs for number, boolean, and trigger inputs respectively:
.setNumberState(stateMachineName: String, inputName: String, value: Float).setBooleanState(stateMachineName: String, inputName: String, value: Boolean).fireState(stateMachineName: String, inputName: String)
// i.e Set input state on a number input
animationView.setNumberState("Designer's Test", "Level", 0f)

// i.e Set boolean state on a boolean input
animationView.setBooleanState("Boolean test", "foo", true)

// i.e Fire a trigger input
animationView.fireState("Trigger test", "fireInput");
⚠️ DEPRECATED FEATURE: Nested Inputs are part of the legacy Inputs system.
Use Data Binding instead for controlling
component properties at runtime. Example
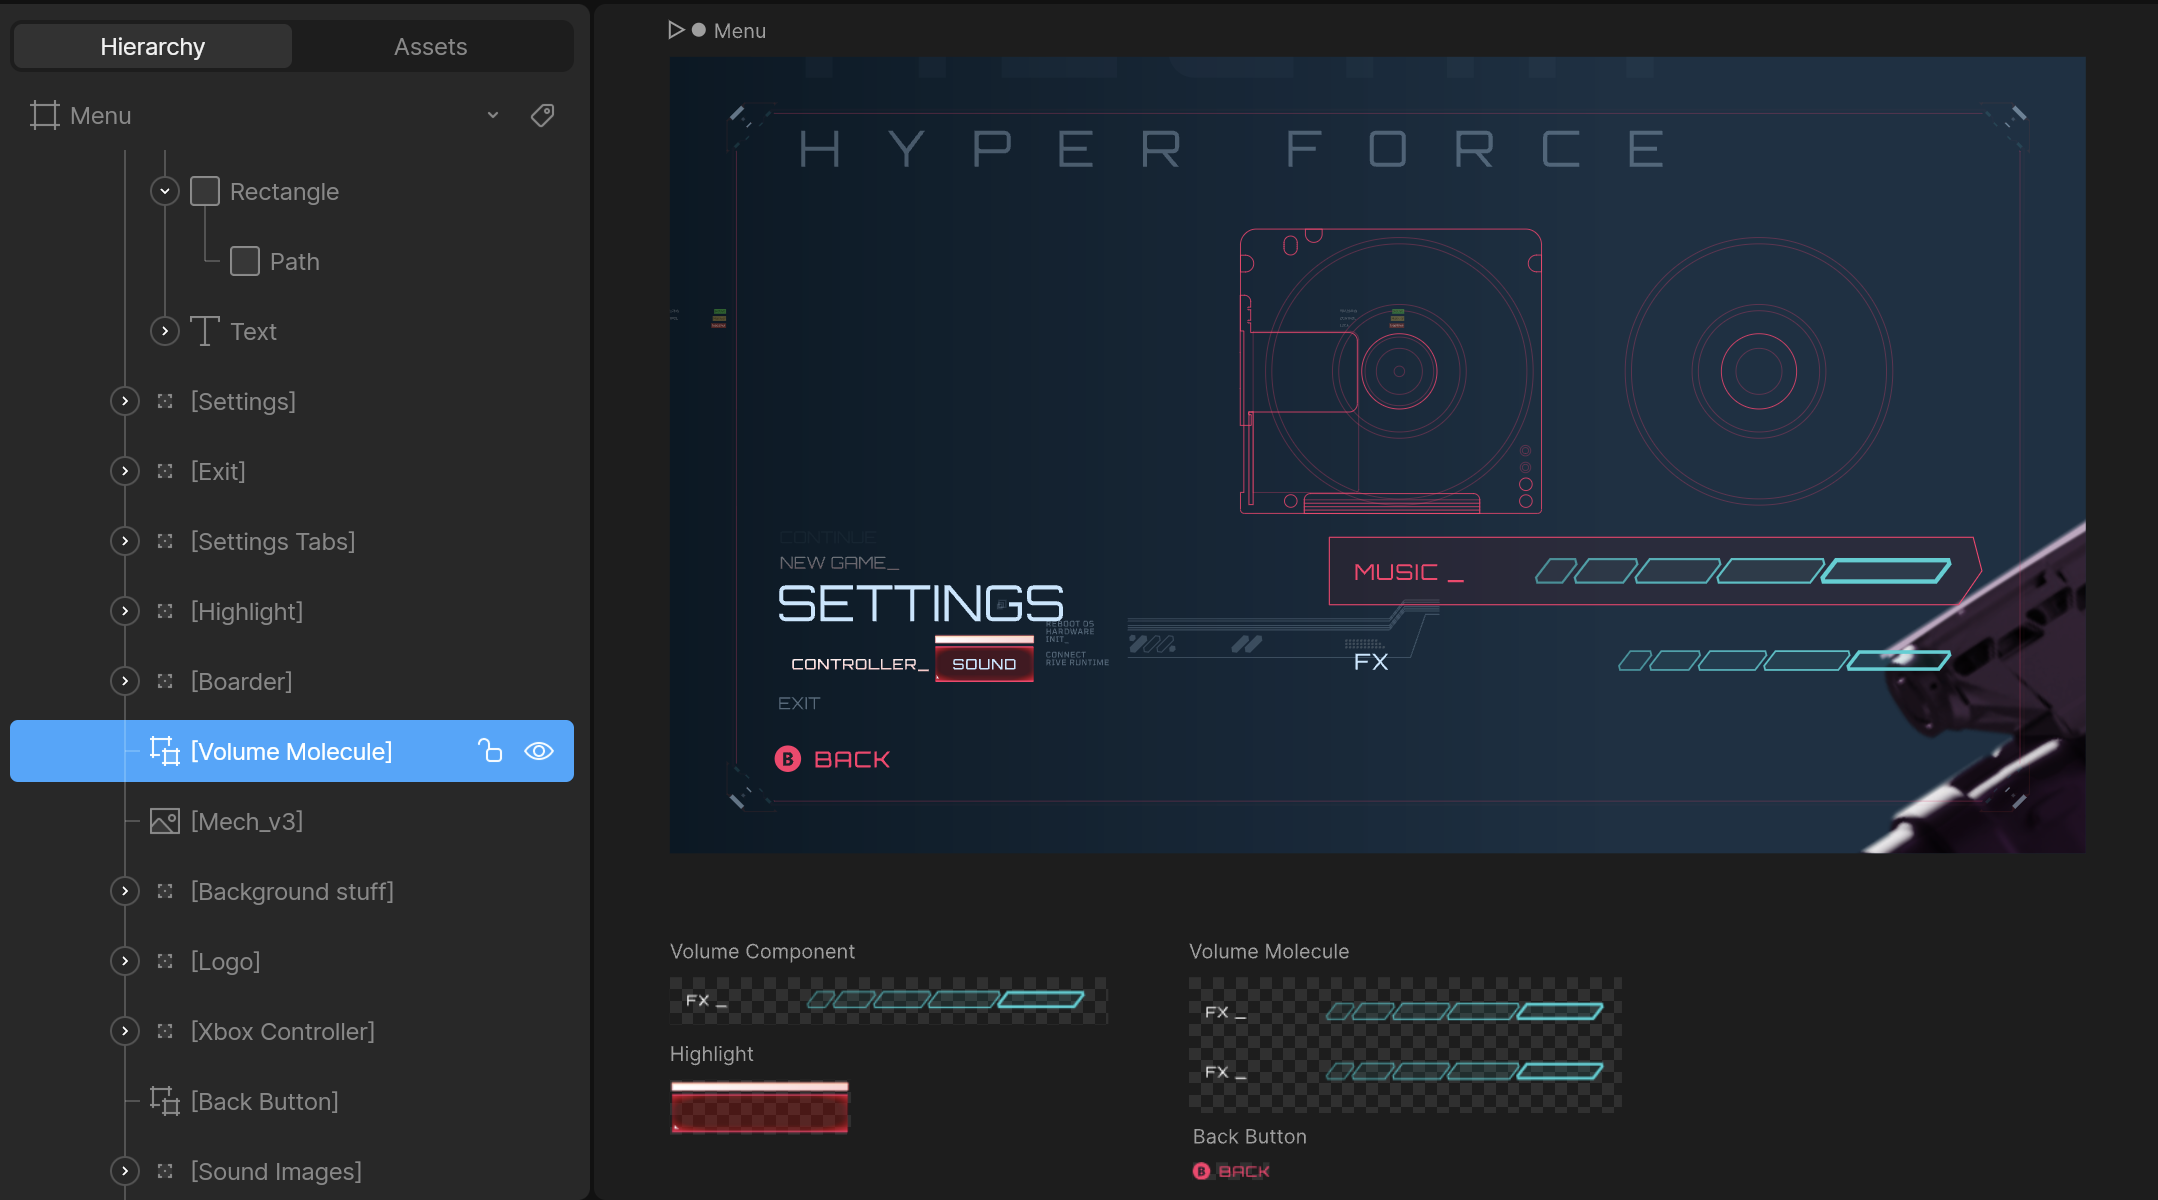
- Use the artboard’s unique hierarchy name, not the artboard’s name.
- Do not include the name of the main artboard. In the example above, the path is
Volume Molecule, not Menu/Volume Molecule.
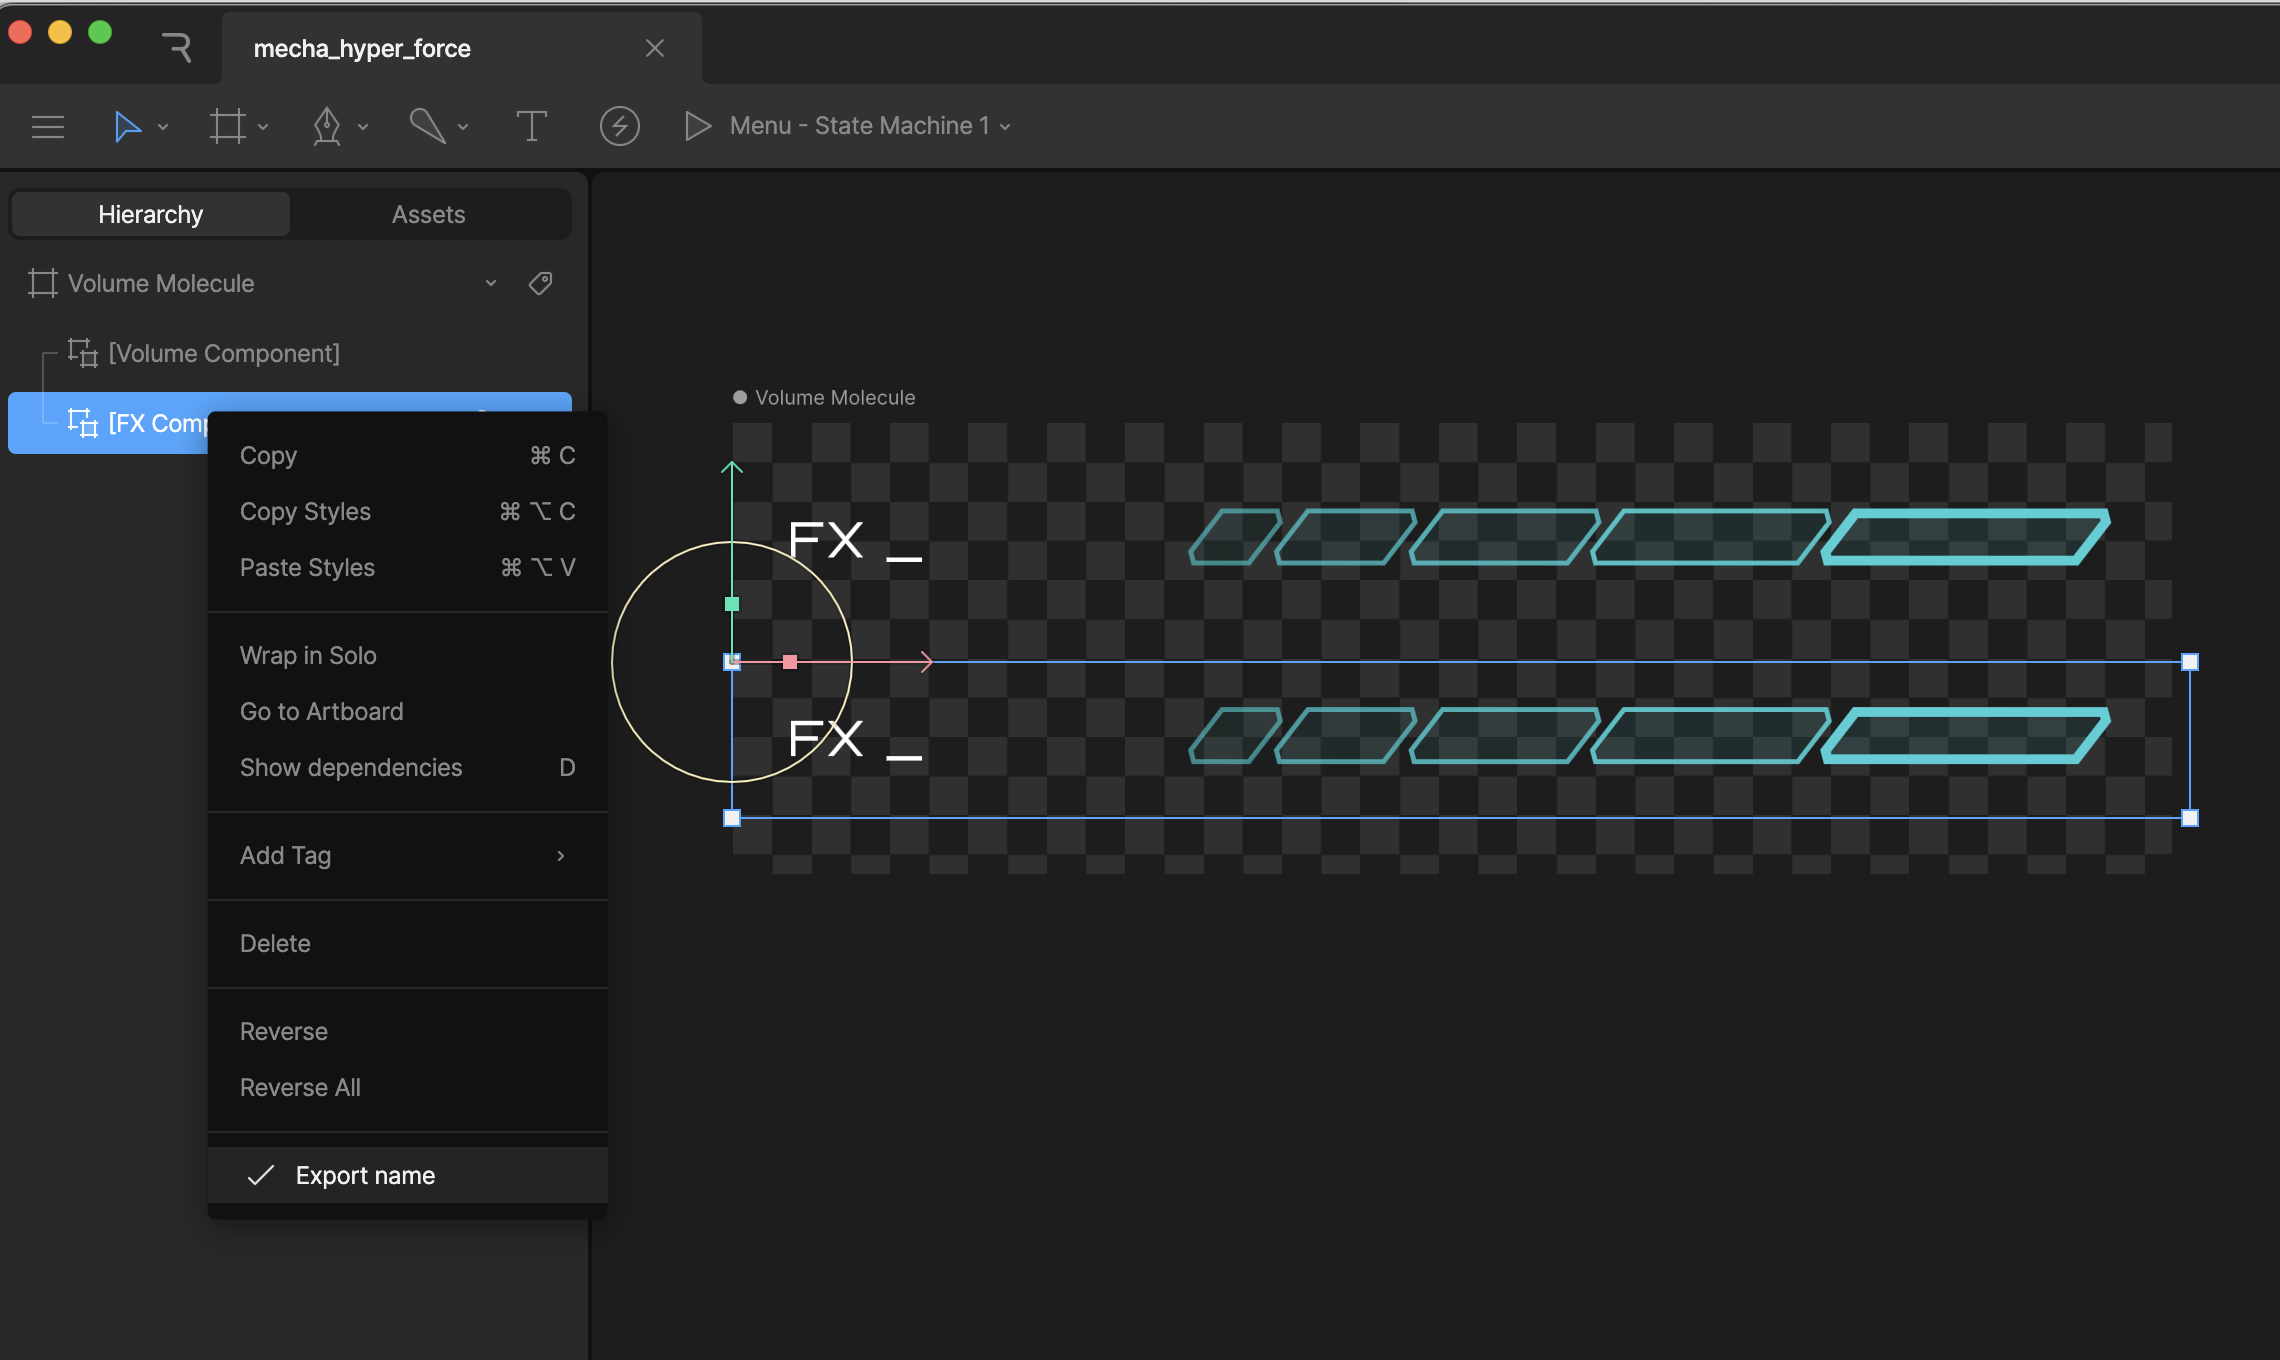
- Ensure the components are marked as exported in the editor to access them at runtime:
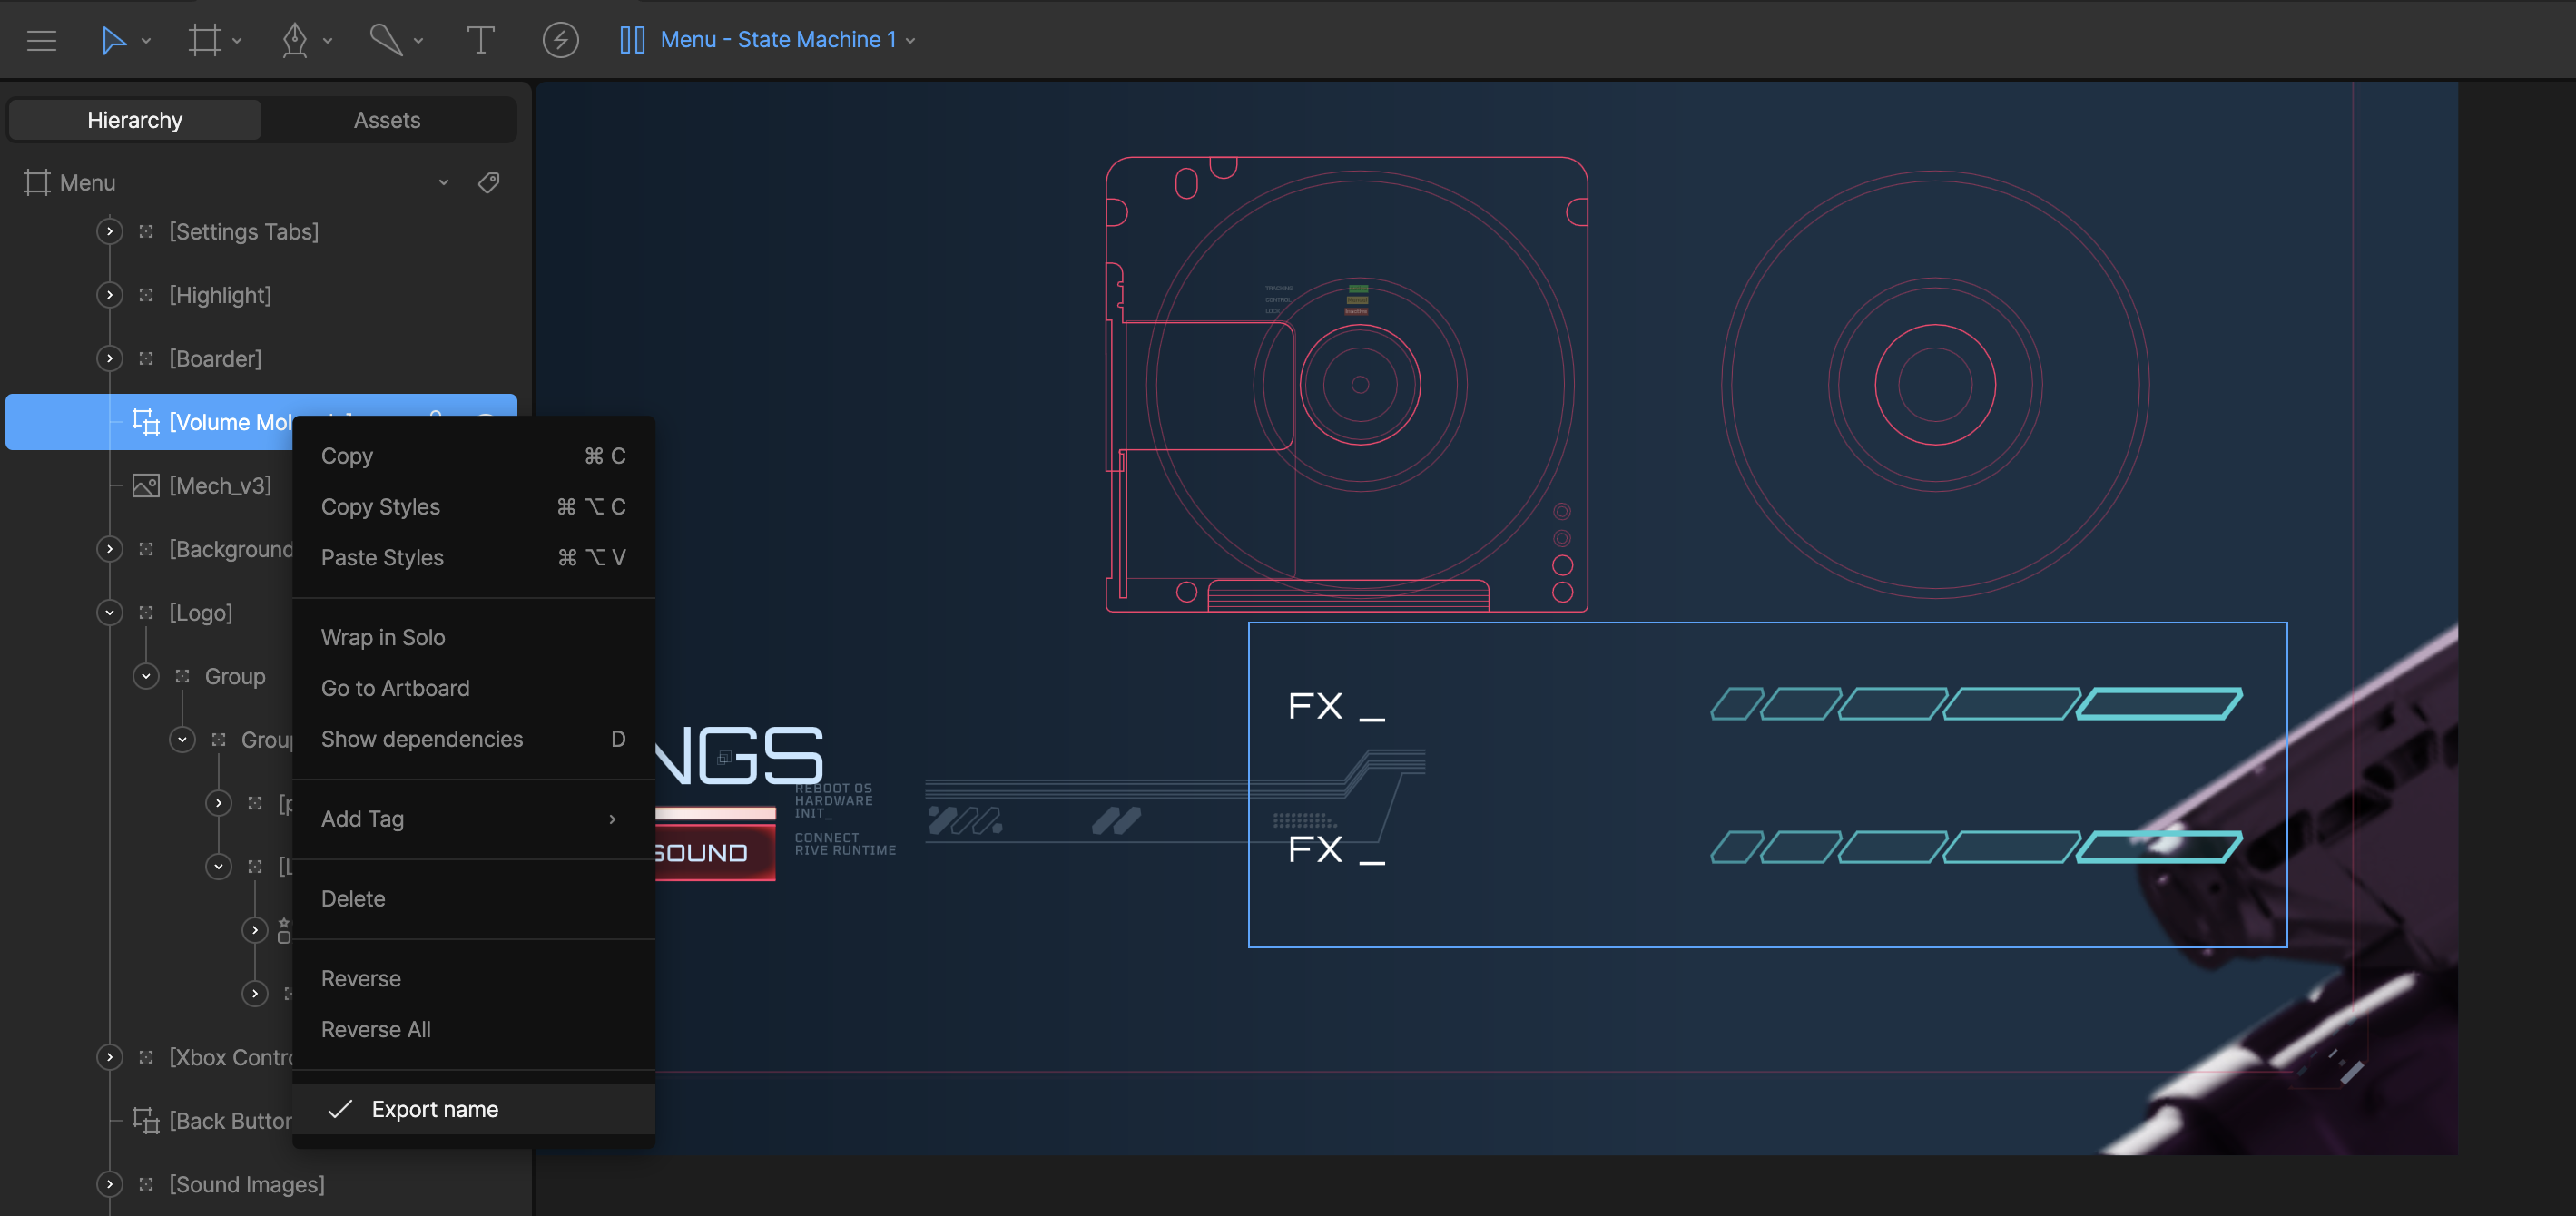
Volume ComponentFX Component
Once you go more than one component deep the path will be a / separated
string of the unique hierarchy names.
 If you load in the Menu artboard at runtime, and want to get/set an input on the
 FX Component artboard, the path will be Volume Molecule/FX Component
Do not use / in the name for your components, as that will break the search
functionality at runtime.
Web
React
React Native
Flutter
Apple
Android
Unity
To set the Volume input for the above example:const rive = new Rive({...});
...
rive?.setNumberStateAtPath("volume", 80.0, "Volume Molecule/Volume Component");
setNumberStateAtPath(inputName: string, value: number, path: string)setBooleanStateAtPath(inputName: string, value: boolean, path: string)fireStateAtPath(inputName: string, path: string)
To set the Volume input for the above example:const {rive, RiveComponent} = useRive({...});
useEffect(() => {
if (rive) {
rive?.setNumberStateAtPath("volume", 80.0, "Volume Molecule/Volume Component");
}
}, [rive]);
setNumberStateAtPath(inputName: string, value: number, path: string)setBooleanStateAtPath(inputName: string, value: boolean, path: string)fireStateAtPath(inputName: string, path: string)
To set the Volume input for the above example:riveRef.current?.setInputStateAtPath("volume", 80.0, "Volume Molecule/Volume Component");
setInputStateAtPath(inputName: string, value: boolean | number, path: string)fireStateAtPath(inputName: string, path: string)
To set the Volume input for the above example:// Get the nested input named 'volume' from the state machine
final controller = RiveWidgetController(riveFile);
final stateMachine = controller.stateMachine;
final volumeInput = stateMachine.number('volume', path: 'Volume Molecule/Volume Component')!;
volumeInput.value = 80.0;
number(name, path: 'path/to/input')bool(name, path: 'path/to/input')trigger(name, path: 'path/to/input')
To set the Volume input for the above example:@StateObject private var riveState = RiveViewModel(fileName: "file_name", stateMachineName: "StateMachineName")
...
riveState.setInput("volume", value: 80.0, path: "Volume Molecule/Volume Component")
setInput(_ inputName, value: value, path) where value can be a Bool, Double, or FloattriggerInput(_ inputName, path: path)
To set the Volume input for the above example:// `animationView` is RiveAnimationView
animationView.setNumberStateAtPath("volume", 80.0, "Volume Molecule/Volume Component")
RiveAnimationView:
setNumberStateAtPath(inputName: String, value: Float, path: String)setBooleanStateAtPath(inputName: String, value: Boolean, path: String)fireStateAtPath(inputName: String, path: String)
All options on RiveFileController:
setNumberStateAtPath(inputName: String, value: Float, path: String)setBooleanStateAtPath(inputName: String, value: Boolean, path: String)fireStateAtPath(inputName: String, path: String)
To
 set the Volume input from the above example:
m_file = Rive.File.Load(asset);
m_artboard = m_file.Artboard(0);
m_artboard.SetNumberInputStateAtPath("volume", 80.0f, "Volume Molecule/Volume Component");
void SetNumberInputStateAtPath(string inputName, float value, string path)float? GetNumberInputStateAtPath(string inputName, string path)void SetBooleanInputStateAtPath(string inputName, bool value, string path)bool? GetBooleanInputStateAtPath(string inputName, string path)void FireInputStateAtPath(string inputName, string path)